When a critical piece of your electrical or electronic system goes quiet, a DPDT (Double Pole Double Throw) relay is often the first suspect. These versatile workhorses, found in everything from industrial controls to automotive systems and home automation, are designed to switch two independent circuits simultaneously. But like any electromechanical component, they can develop issues that bring operations to a grinding halt. Successfully troubleshooting common DPDT relay issues isn't just about replacing parts; it's about understanding the "why" behind the failure and applying a precise fix.
This guide cuts through the jargon to equip you with the knowledge and steps needed to diagnose and resolve the most frequent DPDT relay problems, saving you time, money, and frustration. We'll explore everything from dead coils to sticky contacts, ensuring you can confidently get your systems back online.
At a Glance: Key Takeaways for DPDT Relay Troubleshooting
- Identify the Coil: The heart of the relay, a faulty coil (open or shorted) means no switching action. Test its resistance first.
- Check the Contacts: Dirty, pitted, or welded contacts prevent proper circuit switching. Look for continuity shifts.
- Verify Power Supply: Ensure the coil receives its specified voltage and current. Insufficient power leads to erratic behavior.
- Inspect Wiring: Loose connections or incorrect pinouts are common culprits. Always double-check your connections against the relay's datasheet.
- Listen & Observe: A clicking sound indicates the coil is likely energizing, but lack of switching still points to contact issues.
- Safety First: Always disconnect power before handling relays or making measurements.
Unpacking the DPDT Relay: A Quick Refresher
Before we dive into what goes wrong, let's quickly recap what a DPDT relay is and how it functions. Think of a DPDT relay as two separate light switches operated by a single remote control. "Double Pole" means it has two independent internal switch sections, each capable of controlling a separate circuit. "Double Throw" means each of these poles can switch its connection between two different terminals: Normally Closed (N/C) and Normally Open (N/O).
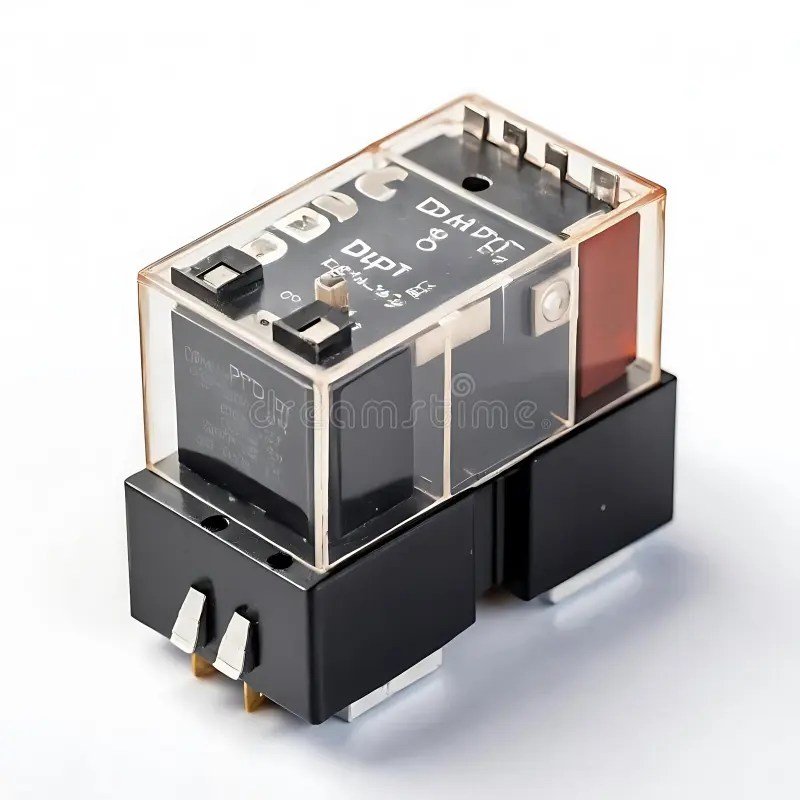
In its simplest form, a DPDT relay typically has eight pins: two dedicated to an electromagnetic coil, and six for the two sets of changeover contacts. Each set of contacts comprises a Common (Pole) pin, a Normally Closed (N/C) pin, and a Normally Open (N/O) pin. When the coil is not energized, the Common pin is connected to the N/C pin for both poles. Apply the rated voltage to the coil, and it magnetizes, pulling an internal armature that switches both Common connections from N/C to N/O. Remove the power, and a spring returns the contacts to their N/C position.
This design makes DPDT relays incredibly versatile, allowing them to simultaneously control two separate devices, reverse a DC motor's polarity, or even switch between different power lines or voltage sources. Because the two poles are internally isolated, they can even manage two entirely unrelated circuits, a critical feature in complex automation and control systems. For a visual representation and deeper dive into how these components are configured, you might find it helpful to review Double Pole Throw Relay Schematics.
Crucial Note on Pinouts: Manufacturers vary widely in their physical pin arrangements. Never assume the N/O, N/C, and Common pins are in the same place across different relay models. Always consult the relay's datasheet or verify pinouts with a multimeter before wiring it into your circuit. This step alone can prevent a host of frustrating issues and potential short circuits down the line.
The First Line of Defense: Multimeter Testing Your DPDT Relay
Before you dismantle an entire system, a multimeter is your best friend for quickly identifying if the relay itself is at fault. Here’s how to test a DPDT relay using its continuity or resistance mode.
Step 1: Identify the Coil Pins
- Set your multimeter to resistance mode (Ohms). Start with a range suitable for hundreds of ohms, e.g., 2kΩ.
- Probe various pairs of pins. You're looking for two pins that show a relatively low resistance reading, typically between 50 and 1000 ohms. This resistance value can vary significantly depending on the relay's voltage rating and design, but it will be a distinct, stable reading, unlike the "open circuit" (OL or infinite resistance) you'll see between most other pins. These two pins are your coil terminals. Mark them if necessary.
- An "open" reading (OL or infinite resistance) between all pin pairs means the coil is likely broken (open circuit), and the relay is dead.
Step 2: Check the Contacts (Unpowered State)
With the coil pins identified, focus on the remaining six pins, which form two groups of three (Common, N/C, N/O).
- Set your multimeter to continuity mode (or a low resistance range).
- For each group of three:
- Find the pin that shows continuity (a beep, or near-zero resistance) with one other pin. This is your Common pin, and the connected pin is its N/C contact.
- The third pin in that group will show no continuity or infinite resistance with both the Common and N/C pins. This is your N/O contact.
- Repeat for the second group of three pins. You should find two Common-N/C pairs, and two isolated N/O pins.
- Confirm isolation: There should be no continuity between the two independent Common pins, or between any contact from one pole and any contact from the other pole. This confirms the "Double Pole" isolation.
Step 3: Check the Contacts (Powered State)
This step verifies the relay's switching action.
- Safely apply the rated voltage to the coil pins. Use a stable DC power supply for DC relays or an appropriate AC source for AC relays. Ensure correct polarity for DC coils if specified (though many small DC relays are not polarity sensitive).
- Observe and listen. You should hear a distinct "click" as the coil energizes and pulls the contacts.
- Re-test continuity for both contact groups:
- The continuity that was previously between Common and N/C should now be broken.
- The continuity that was previously open between Common and N/O should now be established (a beep or near-zero resistance).
- Remove power. The contacts should audibly "unclick" and return to their original N/C connections.
If your relay passes all three of these tests, the relay itself is likely functional, and your problem lies elsewhere in the circuit, such as power supply or wiring. If it fails any step, you've found your culprit. For a deeper dive into the methodology, this guide on how to test a relay with a multimeter offers further insights.
Common DPDT Relay Issues and Their Simple Fixes
Now that you're armed with testing knowledge, let's break down the most common problems you'll encounter with DPDT relays and how to tackle them.
1. The Relay Doesn't Click (Coil Not Activating)
This is perhaps the most straightforward issue to diagnose. If you don't hear the characteristic "click" when the control signal is applied, the coil isn't energizing.
Symptoms:
- No audible click.
- Connected circuit remains in its unswitched state.
- Multimeter shows no continuity shift in contacts when power is applied to coil.
Likely Causes: - No power to the coil: The most common reason. Check the control circuit, power supply, and wiring leading to the coil terminals.
- Incorrect coil voltage/current: The coil might be receiving too little voltage, or not enough current to create a strong enough magnetic field.
- Open coil: The internal winding of the coil is broken, creating an infinite resistance path.
- Shorted coil: The coil windings are shorted, leading to very low resistance, drawing excessive current, and potentially damaging the driving circuit.
- Blown fuse or tripped breaker: The circuit supplying power to the coil might be protected and has opened.
Simple Fixes:
- Verify Coil Power: Use your multimeter to check the voltage across the coil pins when the control signal is active. It should match the relay's rated coil voltage (e.g., 12V DC, 24V AC). If there's no voltage or insufficient voltage, troubleshoot the control circuit upstream.
- Test Coil Resistance: As detailed in Step 1 of the multimeter test, measure the resistance across the coil pins. If it reads "OL" or infinite, the coil is open—replace the relay. If it reads significantly lower than specified (often near zero), the coil is likely shorted—replace the relay. Understanding how to interpret relay coil resistance values is key here.
- Check Fuses/Breakers: If the coil is part of a larger system, ensure no protection devices have activated.
2. The Relay Clicks, But Nothing Happens (Contact Issues)
You hear the satisfying click, but the device it's supposed to control doesn't turn on or switch states. This points directly to the contacts.
Symptoms:
- Audible click when coil is energized.
- Load circuit remains unswitched or intermittent.
- Multimeter shows no continuity shift, or poor continuity, in contacts.
Likely Causes: - Pitted or carbonized contacts: Over time, especially with high current or inductive loads, the contacts can arc, creating carbon deposits or pitting that increases resistance and prevents good electrical connection.
- Welded contacts: Severe arcing can cause the N/O or N/C contacts to physically weld together, permanently stuck in one position.
- Worn out contacts: Repeated switching wears down the contact material, leading to poor connection.
- Weak return spring: If the spring is fatigued, it might not fully return the contacts to the N/C position when the coil de-energizes.
Simple Fixes:
- Perform Continuity Test (Powered & Unpowered): Follow Steps 2 & 3 of the multimeter testing section. If the contacts don't consistently switch continuity, the contacts are faulty.
- Inspect Contacts (If Possible): For some larger, open-frame relays, you might be able to visually inspect the contacts for pitting or welding. Always ensure power is off before doing this. For sealed relays, visual inspection isn't possible.
- Clean Contacts (Caution Recommended): For slightly pitted contacts, very fine sandpaper or a contact cleaning file might temporarily restore function. However, this often removes protective plating and shortens the relay's lifespan. Generally, replacement is the more reliable long-term solution.
- Replace the Relay: For welded, severely pitted, or worn contacts, replacement is the only reliable fix.
3. Intermittent or Erratic Operation ("Chattering")
The relay sometimes works, sometimes doesn't, or makes a rapid buzzing/chattering sound when it should be steadily engaged.
Symptoms:
- Load circuit switches on/off rapidly or inconsistently.
- Relay makes a rapid buzzing or clicking sound (chattering).
- System instability.
Likely Causes: - Insufficient coil voltage: The voltage supplied to the coil is borderline, causing the coil to barely energize, release, and re-energize rapidly. This is common if the power supply is unstable or undersized.
- Excessive ripple on DC supply: For DC coils, a power supply with poor filtering can cause the coil to chatter at the ripple frequency.
- Loose wiring or connections: A connection to the coil or control signal that's making intermittent contact.
- Mechanical vibration: If the relay is exposed to significant vibration, it can cause the contacts to bounce.
- Arcing at contacts: High current loads can cause arcing, which momentarily disrupts contact and leads to chattering.
- Faulty driver circuit: The transistor or component driving the relay coil might be failing, providing an unstable signal.
Simple Fixes:
- Stabilize Coil Voltage: Measure the voltage across the coil. If it's fluctuating or consistently below the rated voltage, troubleshoot the power supply or control circuit. Ensure your power supply can deliver enough current without sag.
- Check Connections: Power off the circuit and meticulously check all wiring to the relay's coil and contacts. Tug gently on wires to ensure they are seated firmly in terminals.
- Add a Flyback Diode (for DC coils): If chattering occurs when the coil de-energizes, it might be due to inductive kickback. A properly installed flyback diode across the coil (cathode to positive, anode to negative) can suppress this, protecting the driving transistor and sometimes preventing issues.
- Isolate from Vibration: If vibration is suspected, mount the relay more securely or use anti-vibration mounts.
- Consider Load Snubbing: For highly inductive loads on the contact side, an RC snubber circuit across the contacts can reduce arcing and improve relay life, potentially mitigating chattering issues caused by contact degradation.
4. Relay Overheating or Emitting Burning Smell
Overheating is a serious symptom, indicating significant power dissipation that can lead to rapid failure and even fire.
Symptoms:
- Relay casing feels hot to the touch.
- Burning plastic or electrical smell.
- Discoloration on the relay or surrounding components.
Likely Causes: - Over-voltage to coil: Applying a voltage significantly higher than the coil's rating will cause it to draw excessive current, overheat, and eventually burn out.
- Over-current through contacts: The load connected to the contacts draws more current than the relay's contacts are rated for. This will cause the contacts to heat up, pit, and potentially weld.
- Shorted coil: As mentioned, a shorted coil draws excessive current and heats up.
- Poor contact connection: High resistance due to pitted or loose contacts will cause localized heating.
- Ambient temperature: Relay operating in an environment that is too hot.
Simple Fixes:
- Check Coil Voltage: Verify the voltage applied to the coil is correct. If too high, adjust the power supply or use a relay with the appropriate coil voltage.
- Verify Contact Load: Ensure the current drawn by the load connected to the relay contacts is below the relay's maximum contact current rating. If the load is too high, you need a higher-rated relay or to use multiple relays in parallel (with caution and proper design).
- Test Coil Resistance: If the coil resistance is too low, it's shorted, and the relay needs replacement.
- Improve Ventilation: If the ambient temperature is too high, consider moving the relay to a cooler spot or improving airflow around it.
- Replace Overheated Relay: Once a relay has significantly overheated, its internal insulation and spring tension may be compromised, making replacement the safest option.
5. Incorrect Wiring or Pinout Mismatch
This is a user error rather than a relay fault, but it's astonishingly common and leads to confusing symptoms.
Symptoms:
- Relay doesn't work at all.
- Connected devices behave unexpectedly (e.g., always on, never on, wrong device activates).
- Short circuits.
Likely Causes: - Misidentified pins: Connecting the load to the N/C contact when N/O was intended, or vice-versa.
- Reversed coil polarity (for some DC relays): While many DC relays are non-polarized, some sensitive or specialized types might require correct polarity.
- Connecting coil power to contact pins by mistake.
- Not consulting the datasheet.
Simple Fixes:
- Consult the Datasheet: This cannot be stressed enough. Always obtain the manufacturer's datasheet for your specific relay model. It provides the definitive pinout diagram.
- Verify Pinouts with Multimeter: Even with a datasheet, it's good practice to perform the multimeter tests (Steps 1 & 2) to physically confirm which pins are N/O, N/C, and Common for each pole, as well as the coil pins. This is especially important if you suspect previous tampering or mislabeling.
- Trace Your Wiring: Carefully follow each wire from its source to its destination. Compare your physical wiring to your schematic or intended wiring diagram. A comprehensive guide on how to wire a DPDT relay can be an invaluable resource here.
- Correct Mistakes: Rewire any incorrect connections according to the datasheet and your circuit design.
Advanced Considerations and Best Practices
While most issues fall into the categories above, a seasoned troubleshooter keeps a few more things in mind.
Choosing the Right Relay for the Job
Many problems stem from using the wrong relay. Always match the relay's specifications to your application:
- Coil Voltage: Must match your control circuit's output.
- Contact Current/Voltage Rating: Must safely handle your load's current and voltage requirements. Don't push a 5A relay with a 10A load.
- Switching Frequency: For high-frequency switching, an electromechanical relay might wear out quickly. Consider alternatives like solid-state relays. To understand the trade-offs, explore the differences between solid-state and electromechanical relays.
- Load Type: Inductive loads (motors, solenoids) cause significant arcing and require relays rated for such loads, often with higher contact material durability. Resistive loads are easier on contacts.
Inductive Loads and Contact Protection
As mentioned, inductive loads are brutal on relay contacts due to the large voltage spikes (back-EMF) they generate when current is interrupted. This causes arcing, pitting, and dramatically shortens relay life.
Solutions:
- Flyback Diode (for DC coils and DC loads): Across the coil, it safely dissipates the back-EMF, protecting the driving transistor.
- RC Snubber (for AC/DC loads on contacts): A resistor-capacitor network across the contacts absorbs the energy from voltage spikes, reducing arcing.
- Varistor (MOV) (for AC/DC loads on contacts): A voltage-dependent resistor that clamps voltage spikes.
The Nuance of Latching Relays
Not all DPDT relays return to N/C when power is removed. Latching relays maintain their contact position even after coil power is removed, requiring a separate pulse (or reversed polarity pulse) to switch back. If you're expecting a standard relay but have a latching one, your troubleshooting approach will be different. For clarity, you might want to understand the nuances of latching vs. standard relays and how they behave.
Wiring for Reliability and Safety
Always use appropriately sized wire gauges for the currents involved. Secure all connections to prevent loosening from vibration. If your circuit requires sequential operation or fault protection, consider designing an effective relay interlock circuit to prevent unsafe states.
When to Repair vs. When to Replace
For most modern, sealed DPDT relays, repair isn't a practical option. Their internal components are tiny, intricate, and often encapsulated. Attempting to open them usually causes more damage than good.
Replace the relay if:
- The coil is open or shorted.
- Contacts are welded, severely pitted, or visibly worn.
- The relay has significantly overheated and shows signs of burning.
- It's an intermittent issue that can't be resolved by checking connections or power supply.
- The relay is chattering due to internal mechanical issues.
Consider deeper troubleshooting (circuit-side) if: - The relay tests perfectly with a multimeter.
- The issue clearly points to a problem with the control signal, power supply, or load circuit, rather than the relay itself.
Final Thoughts: Staying System-Minded
Troubleshooting DPDT relays, like any component in an electrical system, is an exercise in systematic elimination. Start with the simplest checks, verify the power, confirm the coil, then move to the contacts. Often, the problem isn't the relay itself but the environment it operates in—be it an unstable power supply, an overloaded circuit, or simple miswiring.
By approaching each issue methodically and armed with your multimeter, you'll not only fix the immediate problem but also deepen your understanding of these fundamental components. The next time a DPDT relay acts up, you'll be ready to diagnose it with confidence and precision, ensuring your systems run reliably.